We’ll see you in there.
Connect to customize your food & drink discovery.
By signing up you agree to our Terms of Service and Privacy Policy.
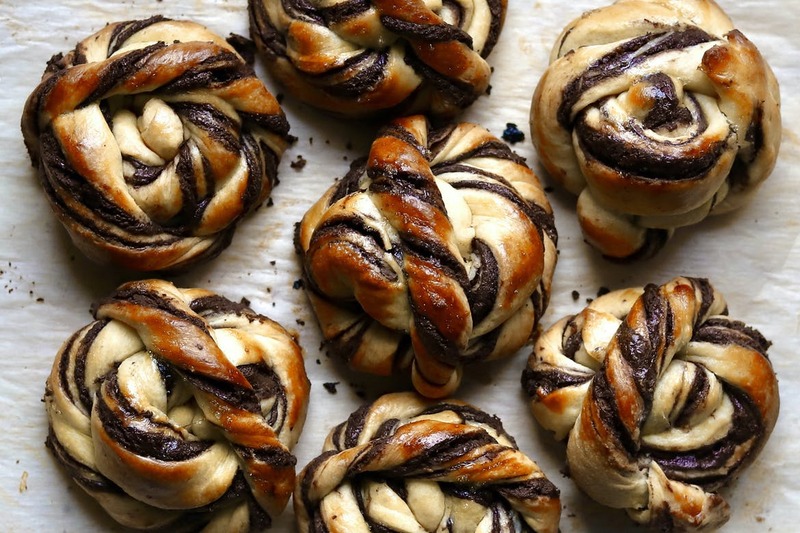
Chocolate Hazelnut Babka Buns
1 hours 0 mins Prep Time
20 mins Cook Time

Who does not love babka? A doughy and simultaneously cakey bread that is layered with decadent chocolate. These are babka chocolate-hazelnut buns/rolls that make the perfect treat. After making your tender, rich dough, you let rise, fill with a rich and sweet filling and begin twisting and twirling your dough strips to make these hand-sized babka buns. They have a nice golden brown finish to them because of the sugar in the dough and the egg white wash that goes on right before baking. They freeze exceptionally well, so for whatever reason, if you are unable to finish them quickly or perhaps want to make them ahead of time and thaw later, they are perfect for that. If you are in the mood to try out a bread recipe but have been intimidated up until now, perhaps start with this. It is not as difficult as it looks and if you have any issues with forming the buns, I suggest watch a Youtube video to help or follow your intuition and instructions below carefully.
Directions
Chocolate Hazelnut Babka Buns
16 Steps
Step 1
Melt butter in microwave in increments of 15 seconds. When melted, add milk, sugar, egg and egg yolk. Save your egg white for your egg wash right before baking.
Step 2
Mix together flour, salt and yeast in a bowl and create a well in the middle of the dry ingredients. Pour wet ingredients into well and use wooden spoon to mix.
Step 3
Tip out of bowl and knead on lightly floured surface for about 6 minutes. You can also knead using dough attachment on a stand mixer for about 3 minutes.
Step 4
Grease a bowl and place dough into bowl, cover with plastic wrap and place in warm place to rise for 1 1/2 hours.
Step 5
To make filling, put all ingredients in bowl: chocolate-hazelnut spread, sugar, butter, cocoa powder, salt and dark chocolate. Place in microwave in 15 seconds increments until ingredients soften, begin to melt and can be mixed together.
Step 6
When the dough has risen, place on a lightly floured surface and roll into a rough 25 x 40 cm rectangle.
Step 7
Spread your filling on rectangle and fold the dough into thirds like a business letter so you end up with a roughly 25 x 14 cm rectangle.
Step 8
Carefully transfer this onto a baking tray and place in fridge to cool and so everything can firm up.
Step 9
After about 20-30 minutes in the fridge, cut the dough into 8 (25 cm long) strips.
Step 10
Twist each strip along the length (think twirler) and coil around itself (think snail shell) and bring the last bit of length over the whole bun and tuck beneath.
Step 11
Line a baking tray with parchment paper and arrange buns on tray. Lightly grease plastic wrap and cover your buns. Place in a warm place to rise for about an hour.
Step 12
About 20 minutes before it is ready, preheat oven to 350°F.
Step 13
Use your left over egg white with 1 tablespoon of water and brush over buns.
Step 14
Bake for about 20 minutes until it is dark golden-brown in most spots.
Step 15
You can eat warm or at room temperature.
Step 16
Store in an air tight container and eat within 2 days or freeze and thaw before eating.
Recommended For You