We’ll see you in there.
Connect to customize your food & drink discovery.
By signing up you agree to our Terms of Service and Privacy Policy.
Iced Oatmeal Cookies
15 mins Prep Time
12 mins Cook Time

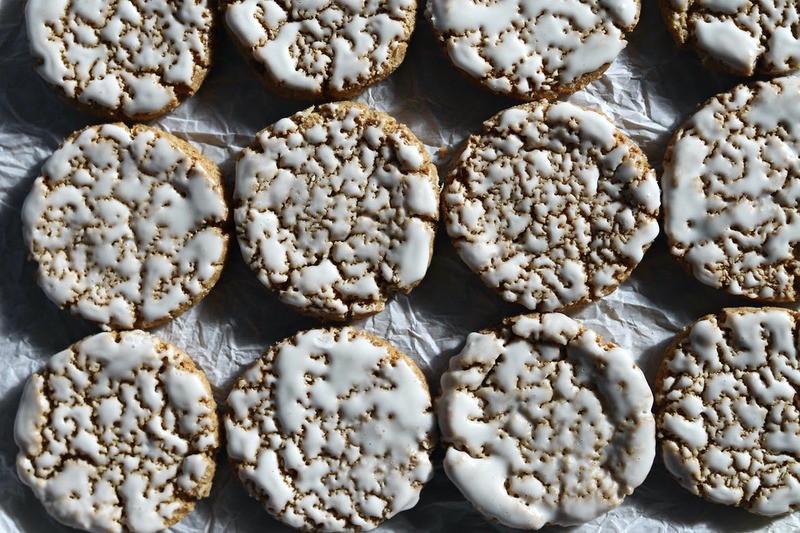
A classic Christmas cookie, which I surprisingly hadn't made before testing out this recipe. Prior to this holiday season, I had not tried these simple yet delicious iced oatmeal cookies. These cookies are tremendously easy to make; the dough can be made entirely in a food processor. They are a sliced cookie, baked and iced with a crispy white icing that hardens and adds a tasty layer of sweetness to each cookie. They resemble perfect circles that look like they have been covered with a light dusting of snow. They are crunchy, have that classic oatmeal taste enhanced with flavours from spices like nutmeg, cinnamon and cardamom. They are the perfect seasonal cookie, freeze well so they can be made ahead of time and are perfect for sharing because they are not messy and can be easily stacked. Add these classic cookies to your baking list this year.
Directions
Dough
9 Steps
Step 1
Make your oat flour by placing oats into food processor or blender and pulse until it is roughly ground. It should not be completely smooth, there should be small pieces of pulverized oats.
Step 2
In a bowl, add your oat flour, flour, sugar, salt, baking powder, baking soda, cinnamon, cardamom and nutmeg. You can use your food processor, stand mixer or use a hand mixer. I prefer to make my oat flour in a food processor and use my stand mixer for the rest.
Step 3
Add in your butter to your dry ingredients and mix until incorporated. Your dough will start to come together and when this happens, add your egg yolk and mix (or pulse if using food processor) until there are no dry spots.
Step 4
Save your egg white by storing in an airtight container, you can use this for your icing.
Step 5
Place your dough on some plastic wrap and form into a log that is about 10 inches long and 1 1/2 inches in diameter. I like my oatmeal cookies a bit larger so go for a shorter length with a larger diameter. You don't really need to measure here, just realize that the diameter of your log will be the size of your cookies.
Step 6
Wrap tightly and place in fridge for at least 3 hours so dough is chilled. You will be slicing it.
Step 7
When ready to bake, preheat oven to 350°F and prepare 2 baking sheets with parchment paper.
Step 8
Slice your cookies using a sharp knife and transfer rounds onto baking tray. I have got anywhere from 16 to 24 cookies and this depends on the shape of your log and how close to 1/2 an inch each cookie is (you are aiming for just under 1/2 inch for each cookie. If your cookies break apart, the dough is very forgiving and you can squish the pieces together.
Step 9
Space your cookies about 2 inches apart and bake for 12 minutes until edges are golden. Place cookies on cooling rack to cool completely. When your cookies bake, they will look more textured and this is perfect to create that 'snow dusted' look when you ice them.
Icing
5 Steps
Step 1
To make icing, add egg white, powdered sugar, vanilla and salt and whisk by hand for about 1 minute until smooth.
Step 2
Add 1 teaspoon of water if you are having difficulty getting it smooth and mix. (Alternatively, you could also do this in a stand mixer or in a medium bowl by hand).
Step 3
Ice cookies one at a time by dipping their top surface first into icing. You want them just to kiss the top. Depending on the finish you want you can experiment with how deep you dip them into your icing.
Step 4
Drip off excess icing, turn over and set to dry. The icing should dry for an hour before serving so it is completely hardened.
Step 5
You can store cookies in an airtight container for up to a week or freeze if necessary.
Recommended For You